How to Edit Trending Videos in Alight Motion – Step by Step Guide
Guys, first of all watch this video because today in this video we are going to learn how to edit this type of trending video and that too with the help of the Alight Motion application. Yes friends, you heard it right. Creating videos like this with Alight Motion is very easy. Just make sure you watch this video till the end. I will explain everything to you on how to create this type of video in a very simple way using Alight Motion.
Step 1: Create a Project
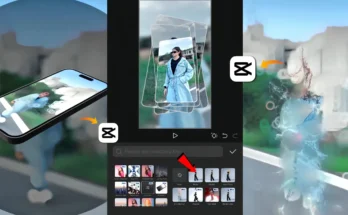
Friends, I have opened the Alight Motion application. First of all, you have to tap on the plus icon and choose 9:16 resolution. Then simply tap on create project. After this, the first thing you need to do is add a background. Tap on the plus icon → Media → add your background photo. Once the background is added, set it to full frame. For that, go to Move & Transform and use scale to zoom and adjust the photo. You can move it a little as per your choice.
Step 2: Add Blur Effect
After adding the background photo, you need to add a blur effect. Go to Add Effect → Gaussian Blur. Turn it on with standard settings and adjust the intensity. The blur effect will now be added to your background. Also increase the length of the background photo so it matches your video timing.
Step 3: Add Music
Now we need music for the video. Tap on the plus icon → Media → select your video. Tap on the three dots and choose Extract Audio. The music will appear. After that, delete the video and keep only the audio.
Step 4: Add Photos
Next, we will add photos one by one according to the music beats. Play the music and check where the beats are. At the first beat, add your first photo. Tap plus icon → Media → add photo. Then go to Move & Transform and adjust the scale, zoom, and position. Add a border effect by tapping Add Border → Outside. Repeat the same process for the next photo with a slight gap between them.
Step 5: Add Animations
After adding all photos, you need to add animations. Tap on a photo → Move & Transform → add keyframes. Set the starting and ending positions of the photo to create smooth movement. Add easing curves for smooth animation. Repeat this process for each photo.
Step 6: Use Shapes & Layers
Friends, now add a shape. Tap plus icon → Shape → Rectangle or any shape. Adjust the size and set stroke to white. Place it in the middle of the photo. Increase stroke thickness and adjust its position. After that, group the shape and photo together to create smooth layered effects.
Step 7: Add Camera Movement
Now add camera movement to make the video dynamic. Tap plus icon → Object → Camera. Delete extra layers. Select the camera layer → Move & Transform → add keyframes. Move the camera up, down, left, or right as needed. Add easing curves to make the camera movement smooth. You can also add rotation effects for cinematic style transitions.
Final Editing
After completing all steps, play your video. You will see that photos move smoothly with animations, blur, borders, shapes, and camera effects. This gives your video a professional and trending style look.
Conclusion
So friends, this is the full process of creating trending videos in Alight Motion. I hope you understood the editing steps clearly. If you face any problem, you can DM me on Instagram or comment below. I will reply to you. If you liked this tutorial, please like the video and subscribe to the channel. See you in the next video. Jai Hind!